We daily receive emails from known and unknown sources. So, it is essential that we understand the risks involved in handling emails in terms of identifying them and thereafter knowing how to best deal with the threats posed by the malicious ones.
The Gmail spam and abuse detection algorithm use multiple signals such as Google's internal algorithm, blacklists, and crowdsourcing among other unknown factors Google doesn't make public to identify incoming messages and help the users on this front.
However, the spammers are extremely smart, and they can find ways to escape the algorithm through innovative ways. This is why, even with an effective spam and abuse detection system in place, one needs to be aware of some essential details so as to remain vigilant while handling emails, should there be a false-negative one.
Everyone knows about Spam, Spoofed, and Phishing emails (among others) and they are the common types of unsolicited emails we receive in our addresses. Determining the authenticity of an email, any email, goes a long way in ensuring one is not interacting with an email that is likely to bring in additional hassles in future.
For screenshots, safe messages from trusted, reputed senders have been used. There are threats that come with using potentially risky emails from untrusted senders.
So, if one is suspicious of an email, for whatever reason, the first step would be to check on the authenticity of the email; by checking its SPF and DKIM details. Information on SPF and DKIM can be read in the linked articles for additional knowledge and better understanding, but Gmail eliminates the learning curve by including two vital details - "signed-by" and "mailed-by" fields when you click on the "Show details" arrow underneath the sender's name and email address.

But what do this check and those details mean?
- If a message is SPF authenticated, a "mailed-by" header with the sending domain name will appear.
- If a message is correctly DKIM signed, a "signed-by" header with the sending domain will appear.
These two simple checks basically ensure the emails are from the server or domain they claim they are from but do not guarantee their contents are safe. So, if they are from a domain one trusts, it helps to a certain extent; especially if it is a work domain one has previously interacted with or has a high level of trust and reputation in the recipient's mind.
In the case of personal accounts belonging to generic web-based email services such as Gmail, Yahoo!, AOL, outlook.com, etc., there is always the possibility of the individual's account being hacked and thereafter used for spam and phishing-related activities.
Under the circumstances where anything looks suspicious related to the text, images, attachments, and links contained within the message or in the signature in the email, contact the sender using a different medium such as - phone, a different email address, some other messaging option to confirm if that specific email was sent by the individual or not.
Another very important detail is to NOT click on any links included in the message or the signature you deem suspicious. You can check the URL destination by hovering over the link displayed in the email.
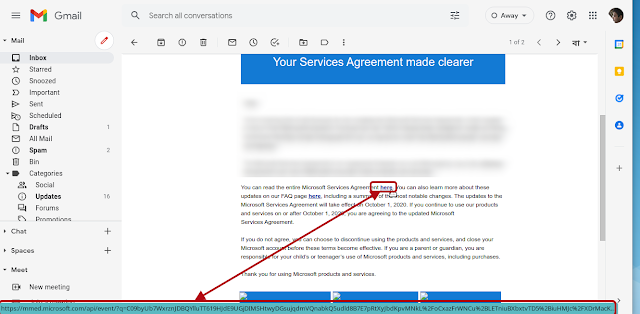
If the link is to a site unknown to you, or you are in some ways, suspicious about it, you can choose to use the Google Site reputation link https://transparencyreport.google.com/safe-browsing/search?hl=en and if applicable, https://cloud.google.com/web-risk to learn more.
Either way, it is important, even critical, to NOT click on any unknown links or attachments - especially if they are executable or compressed files - as they are the most common ways to get affected through viruses, ransomware, malware, spyware, zero-day exploits, key loggers, etc.
If the email is confirmed as safe, there is nothing else to do. However, if the email is adjudged to be one of concern, you need to initiate appropriate action by clicking on the "More" icon next to the "Reply" icon and choosing the most relevant option.

Here are the things to remember while handling unsolicited emails in your inbox:
- The Block option places all subsequent messages from that email address to Spam. It is instantaneous, but it does not report the email to the relevant Gmail team for analysis.

- Both the Report Spam and the Report Phishing options, send the relevant details to the concerned team in Gmail to help them better tweak the Gmail spam and abuse detection algorithm. However, it may take a period of time before the filters become effective.


- The final option is to create a filter. This can be effective when one receives a volume of emails (from random different addresses, similar to "mail bombs") that makes it impossible for the recipient to individually block those senders or wait for the period of time it may take for the spam filter to be effective against those. I suggest one begins by clicking on the "Filter messages like this" option after clicking on the "More" icon next to the "Reply" icon. That way, you allow the system to find matching details that would otherwise escape your attention and add the common keywords or other details such as attachment filetypes into the filter definition to make it more complete before setting it to either direct matching messages to Trash or under a label to later search for any false-positives.


In conclusion, a word on "mail bombs". A mail bomb is the sending of a massive amount of e-mail to a specific person or system. It could be intended to fill up the recipient's disk space to prevent receiving new messages. In some cases, this may follow to distract against any breach of your other accounts, often financial ones. So, please check for that possibility.
Comments
Post a Comment
Please do not post spam or promote your own site(s). All comments are moderated and such comments will not be published.
Also, please keep your comment relevant to the topic of the article.
Finally, please do not post any of your personally identifiable information such as phone number, email address or other important details as this is an open platform.